Skip to forum
Notifications
Clear all

Camtasia Guide

9 Posts
6 Users
0 Reactions
1,336 Views

Using Camtasia

In this Guide: Editing with Camtasia & Technical settings

Before recording

Always conduct a test recording before you begin, even if no settings have changed.

Always use a quality microphone/headset, no Laptop mics.

(If you have no idea what headset to use, here is a recommendation)

• Ensure you have your materials prepared

1. Setup

Choose the "Tools" tab first and then "Options in your Camtasia Studio (main window). Click on the "Zoom" and make sure the "Apply SmartFocus to clips added" is unchecked. Then Press "Ok".

Choose the "Tools" Tab first and then "Options" in your Camtasia Recorder (not the main studio window; instead select the screen capture option & go from there.)

Select "Inputs" and use the following settings:
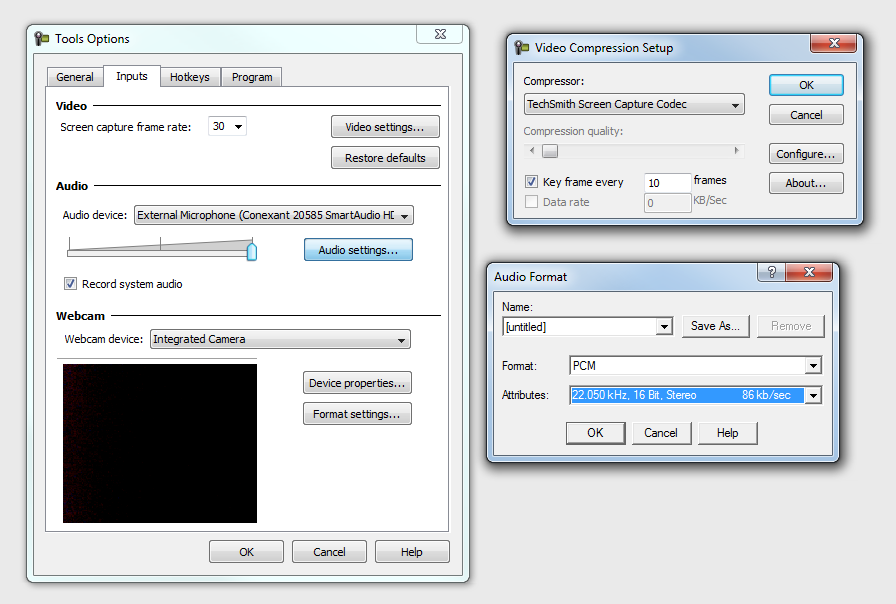
After you've applied all these settings you are ready to start the actual recording - make sure that you double check the settings before every recording.

Recording Dimensions of the Video:

Always set the resolution to the highest possible option.

In this example we record four tables but we do not use the unnecessary black empty space on the left and right. We made the table size as big as possible and then we only have choosen the are of the 4 Tables with "Custom Area"
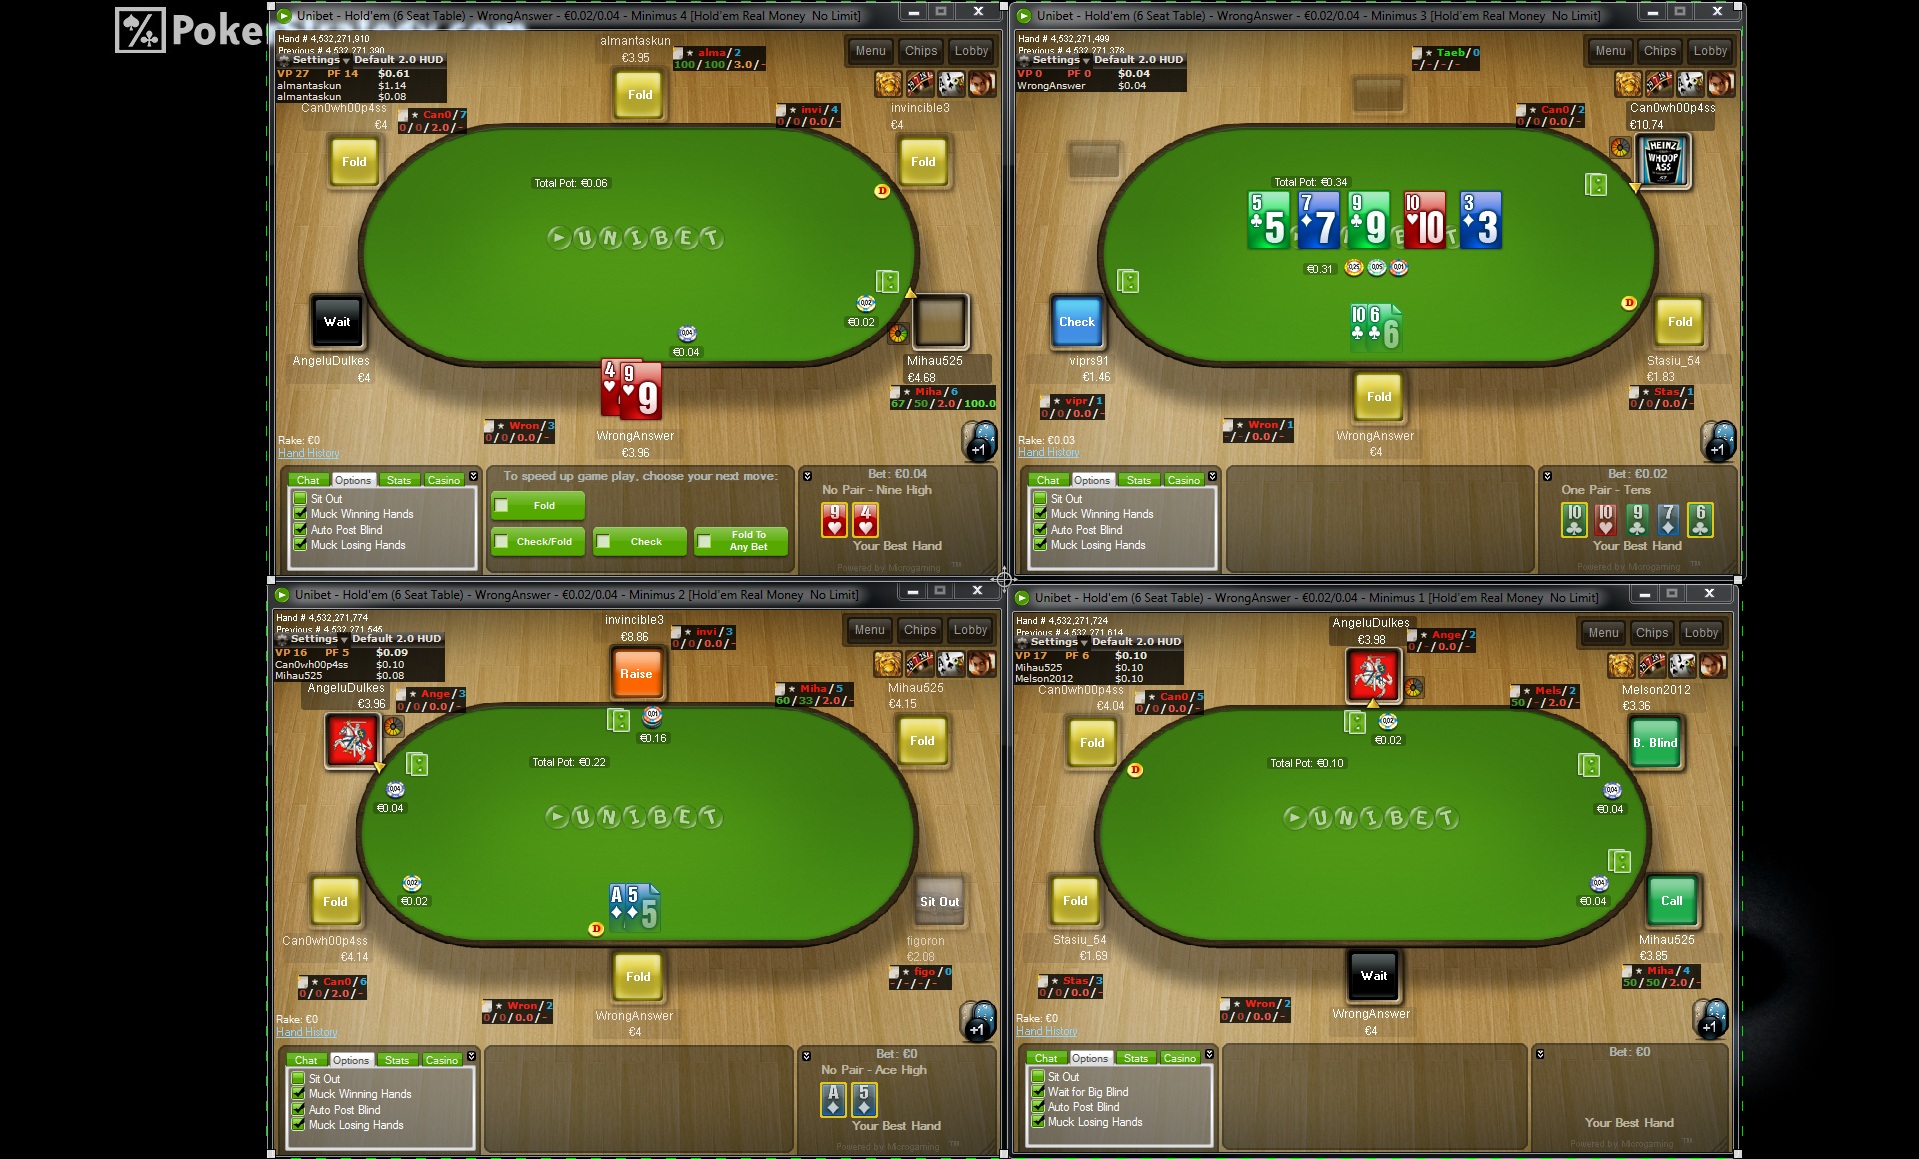
Recording Dimensions

(click to enlarge picture)

For example if you want to record the Hold 'em Manager 2 re-player window only, make this window as large as possible and set the recording area to the full area of the re-player window.

Always record powerpoint presentations in full-screen mode.

Disabling auto zoom:

The auto zoom feature is a feature in Camtasia that is only useful if you really know how to work with it. In general it is advised to disable the feature. You do this by going to:

Tools--->Options--->Zoom--->untick 'Apply SmartFocus in clip added'

Record and save your Video

To start recording there is an option above the "Clip Bin" to open the screen recorder, select this. Simply click the record button to begin. Once you are done recording, press "Stop" to allow the video to save.

After a short rendering time, a preview will appear where further action from us is required to ensure the video is fully stored. Click "Save & Edit" to proceed to the editor with your video securely stored on the computer.

Once you get into the editor, save the project again to be safe.

At this point you may want to edit your video to improve the quality. Continued below are editing & rendering tips.


Reply
Quote
8 replies


2. Editing your Video

Contents: Cleaning the audio, cutting & using Camtasia "call-outs"

1. Audio Cleaning

Microphones record the background noise of the room you are in - this background noise can be sampled in camtasia, and subsequently removed using an automation within the Software, as shown below.

Choose a part of your timeline where there is only silence and no voice, this is the background noise which we want to capture. (blue area) Select a second or two of this "silence" between the red & green selectors and then click "Manual Noise training on selection" to clean the audio. Enable the noise removal check box if not already done automatically and your audio is clean.

2. Cutting your Video

Cutting your video is good if you make a mistake, or if you want to remove any unnecessary silences - at the push of a button. Select where you want to cut the Video and simply press "S" on your keyboard. You can then make another cut to create a slice, which you can edit or remove completely by pressing your "Delete" key.

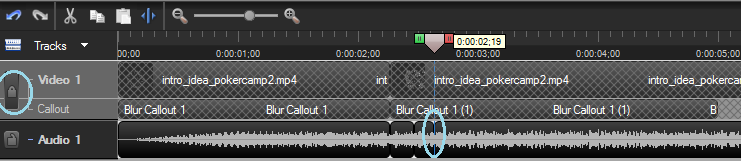
Be Careful: When you cut your Video, the audio track will also be cut at the same location - please keep this in mind or your Video can end up making no sense. First we need to split the Audio from the Video, and then lock the track we want unchanged. To do this we click the blue circle next to the padlocks followed by clicking the padlock of the track we want to lock. Keep in mind if you cut something from the audio / video track, it's length will change.

3. Callouts (Censoring, Watermarking & more)

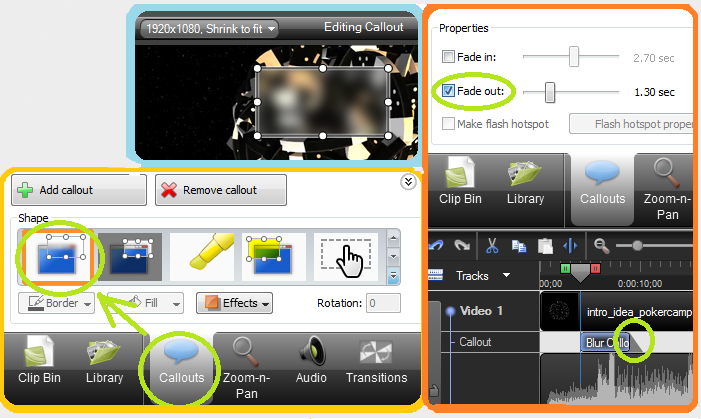
"Callouts" are a function in Camtasia which allow us to add elements to the video, such as a watermark, or a "blur" Callout to censor, for example, a players screen-name. Callouts appear on the time-line, which allows us to choose their duration, fade in/out and we can specify the dimensions of the Callout itself on the video preview.

Avoid using the fade options if you mean to censor something in your video. Also, before recording remove all nicknames from HUD and pop-ups and make sure not to move any tables during the session, as well as moving the replayer window.

To add a watermark to your Video, choose the image callout option - specify the dimensions and location in the preview and the duration and fade options on the timeline. A typical example is a small image in the bottom right corner with high transparency.

Approach your Poker School contact should you need further assistance!

Removing zoom spots:
If you did not disable this feature before recording, it could be that your screen focussed/zooms in to parts of the screen which messes up your presentation. If this is the case, you can still remove it from the .camrec file.
If you want to remove the zooming from your video, go to the timeline of your video, and manually delete the diamonds from the timeline (the diamonds are the zoom spots).


Reply
Quote

3. Rendering the Video

Saving in .camrec (Recorder settings) allows us to go back and change the video in many ways without compromising on quality. So it's good to keep all your projects in .camrec for this reason.

The final render of your video should be .mp4 as this our preferred format. When we render to .mp4, we reduce the file-size drastically and as such the video quality decreases (an acceptable amount) so there is a good balance between file-size and video quality which we aim for. A rough guideline we use is 500 kb/s bitrate in the .mp4 format, although the optimal range is dependent on the video itself.

"Rendering" is what we do to shape the video the way we want. And so when we render, we produce our video according to any specifications we desire.

This is where the important part comes in - Camtasia always saves the dimensions of the previous project, so we need to specify each time the maximum resolution to ensure best quality is maintained at this stage. The resolutions can be changed to the top-left of the video preview screen in the main window of Camtasia.

You will also be prompted to choose the resolution when you drag your video from the Clip bin into the timeline, you should always select "Recording Dimensions" - if you fail to do this, your video will have a very bad quality.

Camtasia should be open, either with your file already on the timeline, or in the clip bin (if so, you should drag to the timeline and choose the resolution)

As standard, you should implement certain post-edits to your production routine, such as noise removal and volume optimization amoung other things. This ensures a standardized higher quality to any video you make.

Now click on "Produce & Share" at the top to specify the dimensions of your render.

A new series of window will open, use the following settings as shown in the screenshots:

Renderprocess

(Click to enlarge)

When you have applied all the settings - begin your render. When completed, conduct a final quality check on your .mp4 and ensure it meets your own high standards of production.


Reply
Quote
malcolmlinco
Joined: 25.08.2010

i have this problem that although i have chosen full screen recording then camtasia still records only the part where my mouse pointer is and very rarely records the whole screen. When i move my mouse pointer from one corner to the other then it records that new corner and etc. How to disable that?


Reply
Quote
Coach
Kyyberi
Joined: 09.07.2010

Looks like you have auto-zoom on. When you edit the video, remove those diamonds from callout section. And select from options auto-zoom off.


Reply
Quote
malcolmlinco
Joined: 25.08.2010

tnx, you seriously saved a lot of hair :)
Here's how to disable it for ver 7:
Tools--->Options--->Zoom--->untick 'Apply SmartFocus in clip added'


Reply
Quote
pLAYERsjsk
Joined: 20.04.2009

thanks :f_love:


Reply
Quote
Coach
DrObst
Joined: 18.04.2007

hey, cant enable the powerpoint add-in, does anyone know a solution to this?

thx


Reply
Quote
Head Admin
SvenBe
Joined: 19.04.2006

Originally posted by DrObst
hey, cant enable the powerpoint add-in, does anyone know a solution to this?

thx

sorted via skype- open office != powerpoint
I can recommend to record the full screen of your 2nd monitor when you run the presentation, just like you would do if you would record normal tables when playing live.


Reply
Quote